Getting Started with Your R36S
Just received your R36S? Follow these essential first steps to get up and running safely and quickly.
⚠️ CRITICAL: Replace the Stock SD Card Immediately!
Why this matters: The included SD card is notoriously unreliable and WILL fail, causing:
- System crashes and freezes during gameplay
- Data corruption - lose your save files and game library
- Boot failures - device won't start up
- Poor performance - slow loading and stuttering
What to do:
- BEFORE playing extensively, purchase a quality replacement SD card (SanDisk or Samsung recommended)
- Use a 32GB-128GB card for the OS (TF1 slot)
- Flash ArkOS or Rocknix firmware to the new card (see Firmware Guide)
- Optionally, get a second card (128GB-512GB) for game storage (TF2 slot)
Recommended SD Cards: See our SD Card Recommendations
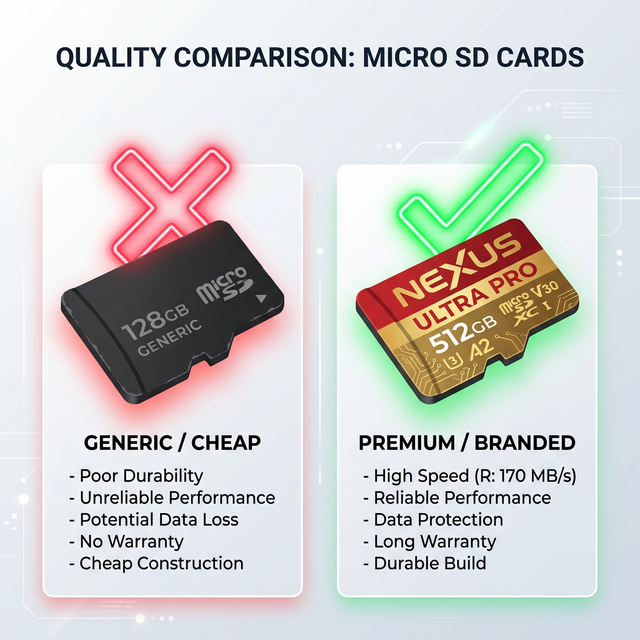
Discard the unbranded generic card that came with the device!
Quick Start Checklist
Follow these steps in order for the smoothest setup experience:
- ✅ Charge the device (2-3 hours for full charge)
- ⚠️ Order a replacement SD card (don't wait until the stock one fails!)
- ✅ First boot (be patient, takes 5-10 minutes)
- ✅ Learn basic controls (hotkeys and navigation)
- ✅ Test with included games (verify everything works)
- ⚠️ Flash custom firmware when your new SD card arrives
- ✅ Add your own games and start playing!
Step 1: First Boot (Be Patient!)
Before Powering On
- Charge the battery: Plug in via USB-C and charge for 2-3 hours (LED indicator should show charging status)
- Check SD card: Ensure the OS card is properly inserted in slot TF1 (top slot near the power button)
Powering On
- Press and hold the power button for 3-5 seconds
- Wait 5-10 minutes on first boot! The system is:
- Expanding the filesystem
- Configuring initial settings
- Indexing game files
- You'll see a loading screen or logo - don't power off during this time!
- Eventually, you'll reach the main menu (EmulationStation or RetroArch depending on stock firmware)
💡 Troubleshooting First Boot
Black screen? See our Boot & Display Troubleshooting Guide
Taking too long? If still booting after 15 minutes, try removing and reinserting the SD card, then power on again.
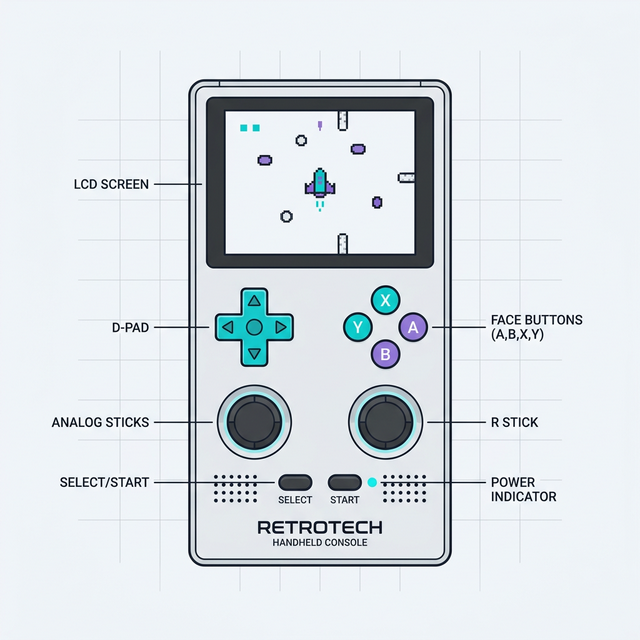
Step 2: Learn Basic Controls
Essential Hotkeys
| Function | Hotkey Combination |
|---|---|
| Exit Game (Return to Menu) | SELECT + START (hold for 2 seconds) |
| Save State (Quick Save) | SELECT + R1 |
| Load State (Quick Load) | SELECT + L1 |
| Fast Forward | SELECT + R2 |
| RetroArch Menu (In-Game) | SELECT + X |
| Screenshot | SELECT + B |
| Volume Up/Down | SELECT + D-Pad Up/Down |
| Brightness Up/Down | SELECT + D-Pad Left/Right |
Main Menu Navigation
- D-Pad / Left Stick: Navigate menus and system lists
- A Button: Select / Confirm
- B Button: Back / Cancel
- START: Open main menu options (scraper, settings, quit)
- SELECT: View game options (favorites, edit metadata)
Step 3: How to Add Your Own Games
Once you've tested the stock firmware, you'll want to add your own game ROMs. Here's the basic process:
Method 1: Direct SD Card Access (Recommended)
- Power off the R36S completely
- Remove the SD card(s) - TF2 (bottom slot) is for games
- Insert SD card into your computer using a card reader
- Navigate to the
romsfolder on the SD card - Find the appropriate system folder (e.g.,
roms/gbfor Game Boy,roms/psxfor PlayStation) - Copy your ROM files into the corresponding folder
- Eject the SD card safely from your computer
- Reinsert into R36S and power on - games will appear after a brief scan
Method 2: Network Transfer (If Using ArkOS/Rocknix)
- Enable Wi-Fi on the R36S (if your model has it)
- Note the IP address shown in Network Settings
- Use an FTP/SFTP client on your computer (FileZilla, WinSCP)
- Connect to the R36S and transfer ROMs to the appropriate folders
📁 ROM File Organization
Important: ROMs must be placed in the correct system folder:
roms/nes- Nintendo Entertainment System (.nes)roms/snes- Super Nintendo (.smc, .sfc)roms/gb- Game Boy (.gb)roms/gba- Game Boy Advance (.gba)roms/psx- PlayStation 1 (.cue/.bin, .pbp, .chd)roms/n64- Nintendo 64 (.z64, .n64)
See our Performance Guide for a complete list of supported systems and file formats.
Step 4: Saving and Loading Games
Two Types of Saves
1. In-Game Saves (Native)
Works exactly like the original console - save within the game menu. These saves are stored in the game's save file.
- Example: Pokemon - use in-game Save feature
- Location: Stored in
saves/folder (usually auto-synced)
2. Save States (Instant Save Anywhere)
RetroArch feature that saves the exact game state at any moment - even mid-level!
- Quick Save: SELECT + R1 (saves to slot 0)
- Quick Load: SELECT + L1 (loads from slot 0)
- Use multiple slots: SELECT + X → RetroArch Menu → Save State / Load State
⚠️ Save State Warning
Don't rely solely on save states! If you switch emulator cores or update firmware, save states may become incompatible. Always use in-game saves for long-term progress.
What's Next?
✅ You're Ready to Play!
You now know the essentials to start gaming on your R36S. Here's what to explore next:
📖 Full Setup Tutorial
Complete step-by-step guide with unboxing, detailed setup, and advanced tips.
Read Full Tutorial →🔧 Install Custom Firmware
Replace stock firmware with ArkOS or Rocknix for better performance and features.
Firmware Guide →⚡ System Performance
Which systems run best? Game compatibility lists and optimization tips.
Performance Guide →🎮 Recommended Accessories
Best SD cards, screen protectors, cases, and upgrades for your R36S.
Accessories Guide →❓ Troubleshooting
Black screen? Audio crackling? Performance issues? Find solutions here.
Troubleshooting Guide →Common Beginner Questions
Q: How long does the battery last?
A: Typically 4-6 hours depending on the system you're playing. PS1 and Dreamcast drain faster than NES or Game Boy. You can extend battery life by lowering screen brightness (SELECT + D-Pad Left).
Q: Can I connect to a TV or monitor?
A: No, the R36S does not have HDMI output. It's designed for portable play only.
Q: What file formats does it support?
A: Varies by system. Common formats: .nes, .smc/.sfc, .gb, .gba, .z64, .cue/.bin (PS1), .chd (PS1 compressed). See our Performance Guide for complete list.
Q: How do I exit a game?
A: Hold SELECT + START for 2 seconds. This is the most important hotkey to remember!
Q: Can I play multiplayer games?
A: The R36S only has one set of controls, so true multiplayer isn't possible. However, you can play turn-based games with friends (passing the device).
Q: Where can I legally get ROMs?
A: We cannot provide ROM files. Legally, you should only use ROMs of games you physically own. Many homebrew and open-source games are freely available online.
🔄 Remember: Replace That SD Card!
If you take away only one thing from this guide, let it be this: the stock SD card WILL fail. Don't wait until you've invested hours into your games. Order a quality replacement now and flash custom firmware for the best experience.