Getting Started with Your R36S
Just received your R36S? Follow these essential first steps to get up and running safely and quickly.
CRITICAL: Replace the Stock SD Card Immediately!
Why this matters: The included SD card is notoriously unreliable and WILL fail, causing:
- System crashes and freezes during gameplay
- Data corruption - lose your save files and game library
- Boot failures - device won't start up
- Poor performance - slow loading and stuttering
What to do:
- BEFORE playing extensively, purchase a quality replacement SD card (SanDisk or Samsung recommended)
- Use a 16–32GB card for the OS (TF1 slot)
- Flash ArkOS or Rocknix firmware to the new card (see Firmware Guide)
- Optionally, get a second card (64–512GB) for game storage (TF2 slot)
Recommended SD Cards: See our SD Card Recommendations
Discard the unbranded generic card that came with the device!
Quick Start Checklist
Follow these steps in order for the smoothest setup experience:
- ✅ Charge the device (2-3 hours on a 5V/2A charger, nearer 4 on a 5V/1A one)
- ⚠️ Order a replacement SD card (don't wait until the stock one fails!)
- ✅ First boot (be patient, takes 5-10 minutes)
- ✅ Learn basic controls (hotkeys and navigation)
- ✅ Test with included games (verify everything works)
- ⚠️ Flash custom firmware when your new SD card arrives
- ✅ Add your own games and start playing!
Step 1: First Boot (Be Patient!)
Before Powering On
- Charge the battery: Plug in via USB-C and charge for 2-3 hours on a 5V/2A charger, or nearer 4 on a 5V/1A one (LED indicator should show charging status)
- Check SD card: Ensure the OS card is properly inserted in slot TF1-OS, on the right side next to the volume buttons
Powering On
- Press and hold the power button for 3-5 seconds
- Wait 5-10 minutes on first boot! The system is:
- Expanding the filesystem
- Configuring initial settings
- Indexing game files
- You'll see a loading screen or logo - don't power off during this time!
- Eventually, you'll reach the main menu (EmulationStation or RetroArch depending on stock firmware)
Troubleshooting First Boot
Black screen? See our Boot & Display Troubleshooting Guide
Taking too long? If still booting after 15 minutes, try removing and reinserting the SD card, then power on again.
Step 2: Learn Basic Controls
Essential Hotkeys
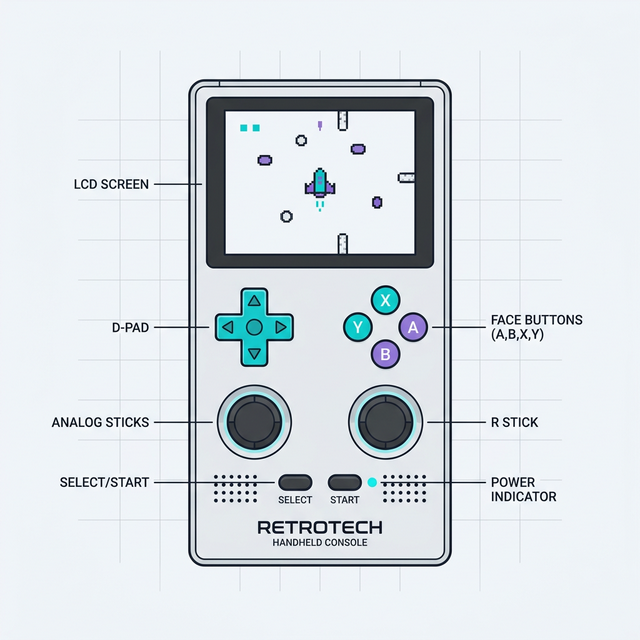
Which key holds these together depends on your firmware: ROCKNIX uses SELECT, the ArkOS builds use FN. Each column below is taken from that firmware's own documentation. The button mapping guide has the full set and explains why the letters printed on this device are not a reliable way to name a button.
| Function | ROCKNIX | ArkOS (FN builds) |
|---|---|---|
| RetroArch Menu (In-Game) | SELECT + Y(NORTH) | FN + X |
| Exit Game (Return to Menu) | SELECT + START, pressed twice | FN + Start |
| Save State (Quick Save) | SELECT + R1 | FN + R1 |
| Load State (Quick Load) | SELECT + L1 | FN + L1 |
| Fast Forward | SELECT + R2 | FN on its own |
| Reset the Game | SELECT + A(SOUTH) | FN + B |
| Screenshot | SELECT + B(EAST) | not documented |
| Show FPS | SELECT + X(WEST) | not documented |
| Brightness Up/Down | SELECT + Vol + / Vol − | FN + Vol Up / Down, or FN + D-Pad Up / Down |
| Volume Up/Down | The physical volume buttons — neither firmware documents a hotkey | |
Exiting is not the same as opening the menu. On both firmwares the modifier plus START leaves the game and takes any unsaved progress with it. The menu is the modifier plus a face button. And if FN does nothing on your R36S, that is normal on a stock unit — the key needs a replacement device-tree file before it works at all.
Main Menu Navigation
- D-Pad / Left Stick: Navigate menus and system lists
- A Button: Select / Confirm
- B Button: Back / Cancel
- START: Open main menu options (scraper, settings, quit)
- SELECT: View game options (favorites, edit metadata)
Step 3: How to Add Your Own Games
Once you've tested the stock firmware, you'll want to add your own game ROMs. Here's the basic process:
Method 1: Direct SD Card Access (Recommended)
- Power off the R36S completely
- Remove the SD card(s) - TF2-GAME, the left-side slot, is for games
- Insert SD card into your computer using a card reader
- Navigate to the
romsfolder on the SD card - Find the appropriate system folder (e.g.,
roms/gbfor Game Boy,roms/psxfor PlayStation) - Copy your ROM files into the corresponding folder
- Eject the SD card safely from your computer
- Reinsert into R36S and power on - games will appear after a brief scan
Method 2: Network Transfer (If Using ArkOS/Rocknix)
- Enable Wi-Fi on the R36S (if your model has it)
- Note the IP address shown in Network Settings
- Use an FTP/SFTP client on your computer (FileZilla, WinSCP)
- Connect to the R36S and transfer ROMs to the appropriate folders
ROM File Organization
Important: ROMs must be placed in the correct system folder:
roms/nes- Nintendo Entertainment System (.nes)roms/snes- Super Nintendo (.smc, .sfc)roms/gb- Game Boy (.gb)roms/gba- Game Boy Advance (.gba)roms/psx- PlayStation 1 (.cue/.bin, .pbp, .chd)roms/n64- Nintendo 64 (.z64, .n64)
See our Performance Guide for a complete list of supported systems and file formats.
Step 4: Saving and Loading Games
Two Types of Saves
1. In-Game Saves (Native)
Works exactly like the original console - save within the game menu. These saves are stored in the game's save file.
- Example: Pokemon - use in-game Save feature
- Location: Stored in
saves/folder (usually auto-synced)
2. Save States (Instant Save Anywhere)
RetroArch feature that saves the exact game state at any moment - even mid-level!
- Quick Save: SELECT + R1 (saves to slot 0)
- Quick Load: SELECT + L1 (loads from slot 0)
- Use multiple slots: open the RetroArch menu (SELECT + Y(NORTH) on ROCKNIX, FN + X on ArkOS) → Save State / Load State
Save State Warning
Don't rely solely on save states! If you switch emulator cores or update firmware, save states may become incompatible. Always use in-game saves for long-term progress.
What's Next?
You're Ready to Play!
You now know the essentials to start gaming on your R36S. Here's what to explore next:
Full Setup Tutorial
Complete step-by-step guide with unboxing, detailed setup, and advanced tips.
Read Full Tutorial →Install Custom Firmware
Replace stock firmware with ArkOS or Rocknix for better performance and features.
Firmware Guide →System Performance
Which systems run best? Game compatibility lists and optimization tips.
Performance Guide →Recommended Accessories
Best SD cards, screen protectors, cases, and upgrades for your R36S.
Accessories Guide →Troubleshooting
Black screen? Audio crackling? Performance issues? Find solutions here.
Troubleshooting Guide →Common Beginner Questions
Q: How long does the battery last?
A: Typically 4-7 hours depending on the system you're playing. PS1 and Dreamcast drain faster than NES or Game Boy. You can extend battery life by lowering screen brightness (SELECT + Vol − on ROCKNIX, FN + Vol Down on ArkOS).
Q: Can I connect to a TV or monitor?
A: No, the R36S does not have HDMI output. It's designed for portable play only.
Q: What file formats does it support?
A: Varies by system. Common formats: .nes, .smc/.sfc, .gb, .gba, .z64, .cue/.bin (PS1), .chd (PS1 compressed). See our Performance Guide for complete list.
Q: How do I exit a game?
A: Press SELECT + START twice. This is the most important hotkey to remember!
Q: Can I play multiplayer games?
A: The R36S only has one set of controls, so true multiplayer isn't possible. However, you can play turn-based games with friends (passing the device).
Q: Where can I legally get ROMs?
A: We cannot provide ROM files. Legally, you should only use ROMs of games you physically own. Many homebrew and open-source games are freely available online.
Remember: Replace That SD Card!
If you take away only one thing from this guide, let it be this: the stock SD card WILL fail. Don't wait until you've invested hours into your games. Order a quality replacement now and flash custom firmware for the best experience.